Jandy · SFTM
Jandy SFTM Sand Filter
Jandy's top-mount sand filter in its two sizes: how much sand each takes, the pressure that means backwash, and why one bought online has no Jandy warranty.
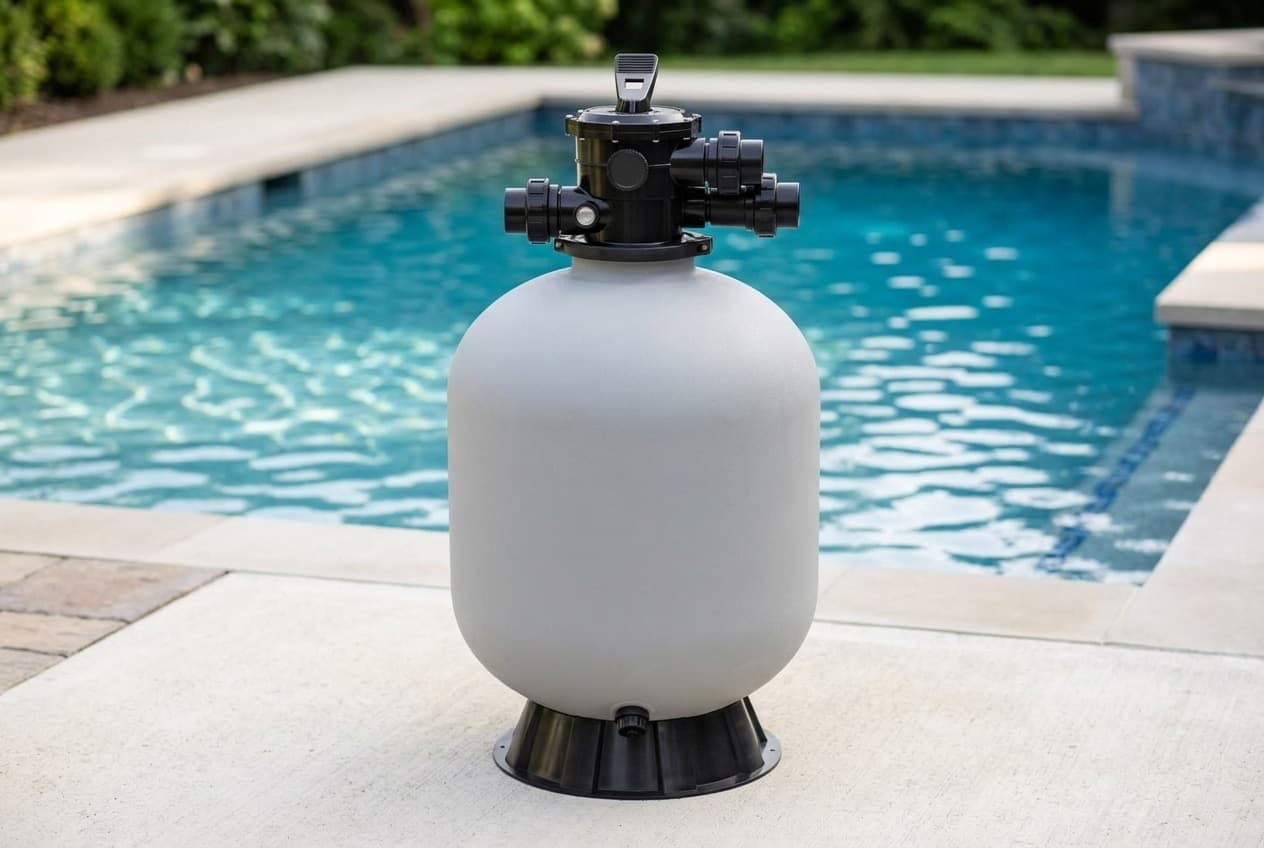
The SFTM is Jandy's top-mount sand filter, the kind with the valve sitting on top of the tank. It comes in two sizes: the SFTM22-1.5, a 22 inch tank with a 1½ inch valve, and the SFTM24-2.0, a 24 inch tank with a 2 inch valve. Both are in Fluidra's 2026 product catalog.
If you're choosing between Jandy's sand filters, the other one is the SFSM, which mounts the valve on the side and goes up to much larger tanks. The SFTM is the smaller, simpler filter.
Sizing: 50 or 60 GPM
The ratings, from Fluidra's catalog and Jandy's brochure:
- SFTM22-1.5: 2.60 square feet of filter area, 50 GPM filtration flow, 38 GPM backwash flow
- SFTM24-2.0: 3.04 square feet, 60 GPM filtration flow, 40 GPM backwash flow
Jandy also gives capacities: 24,960 gallons in 8 hours and 31,200 in 10 for the 22, and 29,760 and 37,200 for the 24. Divide those out and they work at about 52 and 62 GPM, a little above the rated flows. Size to the rated flow.
That's modest for a sand filter. If your pump pushes much more than 60 GPM at the speed you actually run, it's the wrong filter, and the filter sizing guide covers how to match the two. Jandy recommends 2 inch piping at minimum on both, even though the 22's adapters are sized for 1½ inch pipe.
Measure the height before you buy. To lift the valve and the internal piping out for a sand change, Fluidra's catalog says you need 53 inches of clear space above the pad for the 22, and 61 inches for the 24. An SFTM under a low shelf or a deck is a filter you can't service.
Filling it with sand
Both take #20 silica pool filter sand, 0.40 to 0.55 mm. The SFTM22 takes 250 pounds and the SFTM24 takes 300. Jandy says alternate media must follow its own maker's directions, and may void the warranty.
The order matters, and the manual is specific about it:
- Set the filter level on the pad.
- Fill the tank a third to half full of water first. That cushions the laterals from the weight of the sand.
- Make sure the standpipe is seated on the bottom of the tank, and fit the clear standpipe shield so it covers the pipe opening completely.
- Use the sand deflector. Jandy says it must be in place any time media goes in, and that skipping it can put sand in the pool or damage the filter.
- Add the sand slowly with a small scoop, letting the shield drain between scoops so no sand gets into the standpipe.
- Take the shield off and keep it for next time.
The laterals are the fragile part. On the SFTM22, each one locks onto the hub with a quarter turn, and Jandy says snug, not overtightened. On the SFTM24, they fold down into a fully horizontal position. Jandy's warning: cracked or broken laterals send sand to the pool.
Putting the valve on
- Base first. Turn the tank upside down, line the base up so its retention nodes sit between the lock tabs, and turn it clockwise until the tabs seat.
- O-ring below the flange. Turn the valve upside down and seat the valve-to-tank o-ring below the valve body flange.
- Standpipe in the center port. Set the valve on the tank with the standpipe in the valve's center port, and turn it so the pump and return ports need the fewest bends in the plumbing.
- Clamp evenly. The clamp has to catch both the valve flange and the tank. Put the bolts where you can reach them after plumbing, tighten alternately side to side with a Phillips screwdriver, and don't overtighten.
- Tape the adapters, not the unions. Four to six wraps of PTFE tape go on each union adapter's threads at the valve ports. No tape or pipe dope on the union nuts, which go on dry and hand tight. Jandy says pipe dope should never be used on plastic threads at all, because it weakens the plastic.
- The adapters differ by size. The SFTM22 uses a union adapter at the waste port only. The SFTM24 uses union adapters at the waste and return ports, and an extension adapter at the pump port.
On the pad, Jandy wants the filter at least 6 inches from walls and landscaping, at least 5 feet from electrical controls, and in line with the other equipment to keep bends down. Don't level it with sand, which washes out.
The valve's seven positions
Turn the pump off before you move the handle, and stand clear when you start it again.
- Filter: normal running, through the sand and back to the pool
- Backwash: water flows backward through the sand and out the waste port. Watch the sight glass, and stop when the water runs clear
- Rinse: through the sand and out to waste. Jandy says to use it after a backwash to clear debris from the valve, for 1 to 2 minutes
- Waste: skips the sand and sends water straight out the waste port
- Recirculate: skips the sand and sends water back to the pool
- Closed: blocks every passage
- Winter: leaves the handle disengaged and every passage open so the filter drains
Every backwash or drain sends 100 gallons or more out the waste line, so point it somewhere legal that won't flood anything. How to backwash a sand filter walks through the whole sequence.
Pressure: when to backwash, and the 35 psi limit
At first startup, Jandy has you backwash until clear and then rinse. Then set the valve to filter and run the pump at its usual filtration speed. Mark that reading on the gauge as clean.
After that:
- Check the gauge at least once a week.
- Backwash when the pressure stays 10 psi above the clean reading.
- Never let it go over 35 psi, the filter's maximum working pressure.
- If a backwash can't bring it back under 35, change the sand.
Two more pressure warnings from the manual. Don't connect the filter to an unregulated city water line or any other source over 35 psi. And Jandy doesn't want the filter included in a plumbing pressure test at all. If a local code forces it, the limits are 35 psi, water no hotter than 100°F, no longer than 24 hours, and every bit of air let out first. It also warns that high vacuum can crack the tank.
Changing the sand
Loosen the clamp bolts, take the clamp off, and lift the valve off. Jandy's method is to vacuum the old sand out with a wet/dry vac, keeping enough water in the tank that the sand stays a slurry. Then refill it the same way as a new install, deflector and all.
Jandy says to dispose of used filter sand properly, because it isn't fit for human or pet contact. With the valve off and the tank empty, it's also the easiest time to check the valve's o-ring and the laterals, which Jandy's setup steps say to inspect for damage.
Winterizing
- Turn off the pump.
- Move the valve handle to Winter.
- Take out any drain plugs.
- Vent the filter by removing the pressure gauge or undoing one of the unions.
- Drain all the water from the system piping.
- Cover the system with a tarp or plastic sheet against the weather.
Closing a pool for winter covers the rest of the pad.
The warranty, and buying one online
Jandy's standard limited warranty gives the SFTM one year from retail purchase. Two conditions matter more than the length:
- It doesn't cover Jandy products bought online or on other e-commerce platforms. Parts, accessories and valves under 3 inches are the exception, but a whole filter isn't. Buy it online and it has no Jandy warranty.
- It requires professional installation, by a licensed and qualified pool contractor where the law requires one, and otherwise by an experienced professional.
It covers replacing the defective part, not the labor. Replacement parts you buy later are covered for 90 days. Amazon had SFTM replacement parts when checked, but no listing for either complete filter, which is why there's no store link on this page.
Where Jandy's documents disagree
- The SFTM22's height. The 2019 brochure gives 31 inches overall, 33.4 to the inlet and 28.6 to the outlet. The 2024 manual's drawing and Fluidra's 2026 catalog give 36, 33 and 31. This page uses the newer figures.
- Two pressure limits. The manual's warnings and every spec sheet say 35 psi maximum. One sentence in its operating section says the filter should never see internal pressure over 50 psi. Treat 35 as the limit.
- Small errors. The manual converts 41.85 inches to "1.06 mm", and the brochure prints the sand size as "40-55mm" without the decimal points.
Which model do you have?
The model number is on the filter label. Everything else in the range is shared — these are the parts that change with it.
| Model | SKU | Filter area | Filtration flow | Backwash flow | Sand | Height | Clearance to lift out the valve | Multiport valve | Lateral and standpipe assembly | Sand deflector | Unions | Valve rebuild kit | Top valve assembly | Note |
|---|---|---|---|---|---|---|---|---|---|---|---|---|---|---|
| SFTM22-1.5 | SFTM22-1.5 | 2.60 sq. ft. | 50 GPM | 38 GPM | 250 lb | 36 in. | 53 in. | R0744600 | R0745400 | R0745500 | R0745600 | R0987400 | R0987600 | The smaller one: a 22 in. tank with a 1½ in. multiport valve and plumbing adapters for 1½ in. PVC. Its laterals twist onto the hub a quarter turn each, and only the waste port takes a union adapter. |
| SFTM24-2.0 | SFTM24-2.0 | 3.04 sq. ft. | 60 GPM | 40 GPM | 300 lb | 41.85 in. | 61 in. | R0745700 | R0746000 | R0746100 | R0746200 | R0987500 | R0987700 | A 24 in. filter, 23.75 in. across the tank, with a 2 in. valve and adapters for 2 in. PVC. Its laterals fold down into place rather than screwing on, and it uses union adapters at the waste and return ports and an extension adapter at the pump port. |
Jandy SFTM Sand Filter parts, and what goes wrong
Read off the manufacturer’s parts list and checked before it ships. Open a row for what a bad one actually does — or start from the symptom and work down, which is the cheaper order.
What is it doing?
Jandy says to assemble the unions dry and hand tight, with no PTFE tape, pipe dope or glue on the union nuts. Tape goes only on the adapter threads at the valve ports, four to six wraps. The SFTM24 uses R0746200, a 2 inch kit with adapter.
Live pricing arrives when the retailer programs are approved.
Jandy's manual says cracked or broken laterals send sand to the pool. On the SFTM22 each lateral locks onto the hub with a quarter turn, and Jandy says snug, not overtightened. It also says to add sand slowly until the laterals are covered, so they aren't strained. The SFTM24's assembly is R0746000, with laterals that fold down into place.
Live pricing arrives when the retailer programs are approved.
Seals the multiport valve to the top of the tank, on both sizes. Jandy's instruction is to turn the valve upside down and seat the o-ring below the valve body flange before the valve goes on. It comes off every time the valve does, including every sand change.
Live pricing arrives when the retailer programs are approved.
The clamp that holds the valve to the tank, on both sizes. Jandy says to position it over both the valve flange and the tank, tighten it alternately side to side, and not overtighten it. It warns never to adjust or remove the valve with the pump running or pressure in the system, because the valve can be blown off.
Live pricing arrives when the retailer programs are approved.
Jandy calls the gauge the primary indicator of how the filter is running, and asks for it to be kept in good working order. Screw it in until snug, and don't overtighten it. It's also how you vent the filter for winter: take the gauge out.
Live pricing arrives when the retailer programs are approved.
Jandy says the sand deflector must be used any time filter media goes in, and that skipping it can put media into the pool or damage the filter. The SFTM24's is R0746100.
Live pricing arrives when the retailer programs are approved.
The drain at the bottom of the tank, on both sizes. Jandy's brochure calls it a combination water and sand drain. It comes out every winter, when the manual says to remove any drain plugs from the filter.
Live pricing arrives when the retailer programs are approved.
The valve's internal parts as one kit, key 11 on Fluidra's diagram for the 1½ inch valve. The SFTM24's 2 inch valve takes R0987500. Replacing the whole top of the valve is R0987600 or R0987700.
Live pricing arrives when the retailer programs are approved.
Jandy's backwash instruction is to watch the water through the sight glass and stop when it runs clear. The same kit on both sizes.
Live pricing arrives when the retailer programs are approved.
If you are doing the job anyway
Changing the sand means lifting the valve off, which is the time to replace the o-ring under it and look at the laterals.
Changing the sand, SFTM22-1.5
The valve comes off, so the valve-to-tank o-ring is exposed, and with the old sand out the laterals and standpipe can be checked for cracks before 250 lb of new sand goes back on top of them.
- Valve to tank o-ringR0745800
- Lateral and standpipe assembly, SFTM22-1.5R0745400
Changing the sand, SFTM24-2.0
The same job on the larger filter, with its own folding lateral assembly under 300 lb of sand.
- Valve to tank o-ringR0745800
- R0746000R0746000
Jandy SFTM Sand Filter manuals and documentation
Hosted by the manufacturer. These open on Jandy’s own servers, so they stay current.
- SFTM top mount sand filter installation and operation manual (H0579200, 2024)manual
- SFTM top-mount sand filter brochure (4732_SL, 2019)spec
- Fluidra 2026 product catalog, SFTM specifications and parts lists (pages 60 and 61)diagram
- SFTM product pagespec
- Jandy limited warranty, USA and Canada (H0333803)guide
Jandy SFTM Sand Filter warranty
1 year parts
One year from the date of retail purchase, under Jandy's standard limited warranty. It doesn't apply to Jandy products bought online or through other e-commerce platforms, except valves under 3 in., parts and accessories, so a whole filter bought online has no Jandy warranty. It also requires installation and service by a licensed, qualified pool contractor where the law requires one, and otherwise by an experienced professional. It covers replacing the defective part, not the labor. Purchased replacement parts are warranted for 90 days. The manual adds that alternate filter media may void the warranty.
Manufacturer’s termsJandy SFTM Sand Filter complete parts list
Every part on the manufacturer’s exploded diagram, in their numbering. Marked rows are the ones covered above with a symptom and a diagnosis.
| No. | Part | Description | Note |
|---|---|---|---|
| 1 | R0744600 | 1½ in. multiport valve with clamp assembly | SFTM22-1.5 |
| 2 | R0744700 | Top rotor assembly | SFTM22-1.5 |
| 3 | R0745100 | Flange clamp assembly what goes wrong | SFTM22-1.5; key 2 on the SFTM24-2.0 |
| 4 | R0745200 | Drain cap and o-ring what goes wrong | SFTM22-1.5; key 3 on the SFTM24-2.0 |
| 5 | R0745300 | Lateral, full set | SFTM22-1.5, 8 required |
| 6 | R0745400 | Lateral and standpipe assembly what goes wrong | SFTM22-1.5 |
| 7 | R0745500 | Sand deflector what goes wrong | SFTM22-1.5 |
| 8 | R0745800 | O-ring, valve to tank what goes wrong | SFTM22-1.5; key 5 on the SFTM24-2.0 |
| 9 | R0745000 | Pressure gauge assembly what goes wrong | SFTM22-1.5; key 7 on the SFTM24-2.0 |
| 10 | R0745600 | 1½ in. unions kit what goes wrong | SFTM22-1.5, 3 required |
| 11 | R0987400 | Multiport valve rebuild kit what goes wrong | SFTM22-1.5 |
| 12 | R0987600 | Top valve assembly | SFTM22-1.5 |
| 13 | R0989300 | Sight glass with plug kit what goes wrong | SFTM22-1.5; key 11 on the SFTM24-2.0 |
| 1 | R0745700 | 2 in. multiport valve with clamp assembly | SFTM24-2.0 |
| 4 | R0746100 | Sand deflector | SFTM24-2.0 |
| 6 | R0746000 | Lateral and standpipe assembly | SFTM24-2.0 |
| 8 | R0746200 | 2 in. unions with adapter kit | SFTM24-2.0 |
| 9 | R0987500 | Multiport valve rebuild kit | SFTM24-2.0 |
| 10 | R0987700 | Top valve assembly | SFTM24-2.0 |