Jandy · SFSM
Jandy SFSM Sand Filter
Jandy's side-mount sand filter in four sizes: how much sand each takes, the backwash valve it can't run without, and a weight limit its own sand table breaks.
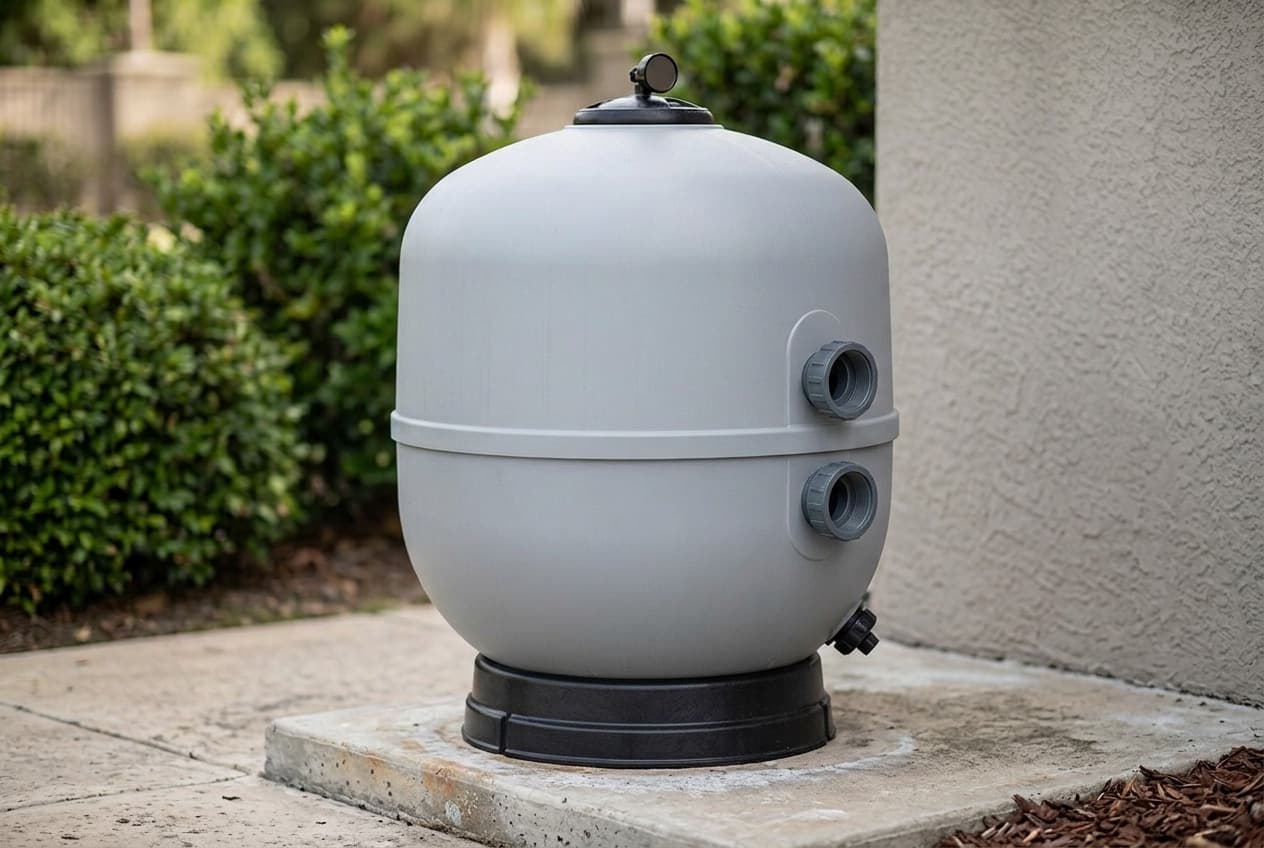
The SFSM is Jandy's side-mount sand filter. It comes in four sizes, sold as 24, 30, 35 1/2 and 37 inches, and the three larger ones come in two versions: the plain model number for union connections, and an F suffix for 3-inch flanges. It has no valve of its own. Every SFSM needs a backwash valve bought separately, with ports 7.5 inches apart. Jandy's 2022 manual covers all seven models, and Fluidra's 2026 catalog lists them all as current.
Choosing a size
The sizes differ in filter area, and area sets the flow. Jandy's maximum filtration rate is 20 GPM per square foot on every model:
- SFSM60: 3.15 sq. ft., 63 GPM maximum, 375 lb of sand.
- SFSM100: 5.00 sq. ft., 100 GPM, 625 lb.
- SFSM120: 5.90 sq. ft., 118 GPM, 1,050 lb.
- SFSM140: 7.06 sq. ft., 141 GPM, 1,200 lb.
Two other numbers matter. The minimum backwash flow, 47 GPM on the smallest and 105 on the largest, is what the pump has to deliver to clean the bed. The clearance above the filter to lift the lid out runs from 40 inches on the SFSM60 to 52 on the SFSM140, per Fluidra's catalog.
The model names are nominal. The "24-inch" SFSM60 is 26 inches across, and the "30-inch" SFSM100 is 32.5. The SFSM120 is the one Jandy says fits through a 36-inch door, and it measures 35.5.
Choosing a valve
Jandy lists three, all for the SFSM's 7.5-inch port spacing:
- Multiport valve, BWVL-MPV-75.
- Slide valve, BWVL-SLD-75.
- 2-in-1 Never Lube valve, BWVL-NVL-75.
Jandy's JS sand filter and DEV D.E. filter take 8-inch valves, which are different part numbers.
Where it goes
- On a firm, level, non-absorbent pad, never leveled with sand, which washes out. Use a surface rated for the weight: see the disagreements below for how heavy a full one gets.
- At least 6 inches from walls and landscaping, and at least 5 feet from electrical controls.
- Not under eaves or overhangs that would stop the lid coming out.
- In line with the other equipment, to keep bends in the plumbing down.
- Above the pool's water level: up to 2.5 feet without hurting pump efficiency, with a check valve on the pump's suction line.
- Below the pool's water level: isolation valves on the suction and return lines.
- Anchored through the three holes in its base where codes require it, with concrete screws you buy separately. Don't overtighten them.
Every backwash sends 100 gallons or more to waste, so the drain has to meet local codes. A waste line that discharges 10 feet or more below the pool's surface needs a vacuum breaker.
Plumbing rules
- Install it only on the discharge side of the pump.
- Never put a shutoff valve on the filter's outlet. Jandy warns that running the pump against a closed outlet valve can cause an explosion. If a shutoff valve is unavoidable, it has to be labeled "WARNING: Explosive Hazard. Do Not Run System With Valve Closed."
- Chemical feeders and chlorine generators go downstream of both the filter and the heater, with a check valve.
- If the system can exceed any component's pressure rating, install an ASME-compliant pressure relief valve or regulator.
- Unions: silicone lubricant on the o-rings only. No glue, pipe joint compound, Teflon tape or pipe dope.
- Support the pipes so they don't strain the backwash valve.
- Never pressure test above 35 psi, or with water above 100°F. Jandy says the filter shouldn't be part of the piping pressure test at all if it can be avoided.
Filling it with sand
The internals come assembled. Before any media goes in, check the laterals are screwed tight into the hub, the hub is centered and the laterals are level, and replace any cracked in shipping.
- Fill the tank halfway with water.
- Cover each diffuser with a plastic bag, without dislodging the vent tube and screen.
- If using pea gravel, 1/8 to 1/4 inch, pour it in slowly and level it 1 inch above the laterals.
- Pour the sand in slowly with a small scoop: #20 silica sand, 0.016 to 0.021 inch. Stop at the freeboard for your model. Jandy says freeboard, not weight, is what to go by.
- Uncover the diffusers, and check they're upright and centered.
- Check the vent tube runs up through the diffuser with the vent screen on top.
- Rinse the tank threads with water.
Jandy says any NSF-approved alternative media works too, following the media maker's instructions and Jandy's freeboard levels.
The lid and the gauge
To remove the lid: turn the hand wheel counterclockwise until it's loose, press it down firmly to release the o-ring, turn the whole lid 15° counterclockwise, and lift it out by the hand wheel.
To fit it: start with the lid fully off so the o-ring is uncompressed. Drop it in, turn it 15° clockwise, then turn the hand wheel clockwise as far as it goes.
The gauge goes on the lid: the gasket into the bottom of the tee, the tee onto the lid's threaded stem (no tape), the vent plug into the tee's larger hole, and the gauge into the tee with PTFE tape. Don't overtighten the gauge.
Starting it up
- On a new plaster or gunite pool, or one full of dust or debris, run the filter in Filter for 48 hours before this backwash.
- Turn the pump off at the breaker. Check the drain plug and the lid are tight, open the backwash piping, and set the valve to Backwash.
- Restore power, and prime the pump if needed.
- Open the air release valve with the thumbscrew on the back of the gauge housing. Don't take the thumbscrew out.
- Stand clear (Jandy says never within 5 feet) and start the pump.
- When a steady stream of water comes out of the vent hole, close the air release valve. If no air comes out at all, turn the pump off and check the valves are open, the pump is primed and the thumbscrew is loose.
- Backwash 3 to 5 minutes, until the water runs clear. Pump off.
- With a multiport valve, set Rinse and run it 30 to 40 seconds. Pump off.
- Set the valve to Filter, open the air release again, and repeat the venting.
- Once the gauge settles, turn the ring so the Clean arrow lines up with the needle, and write that pressure down.
Always turn the pump off before moving the valve, and never run the filter above 50 psi.
When to backwash
When the gauge climbs 10 to 12 psi above your clean reading, which is where the ring's Dirty arrow sits. The other sign is return flow 30% lower than with a clean filter. Keep the pump at the same speed for both readings.
Not on a schedule. Jandy says backwashing too often makes the filter worse, because a slightly loaded bed catches finer particles. It also says not to run the system 24 hours a day, day after day. Letting the filter stop now and then disturbs the "mud-deck" on top of the sand slightly, and lowers the running pressure.
The routine backwash: pump off, valve to Backwash, stand clear, pump on for 3 to 5 minutes until the water runs clear, pump off. Rinse for one minute if the valve has it, then pump off, valve to Filter, and vent the air as at start-up.
Chemical cleaning
If the gauge is still more than 5 psi above your clean reading after a backwash, the sand bed needs a chemical clean.
- Backwash, then shut the pump off.
- If the filter is below the pool's water level, close the isolation valves. Drain the filter and refit the drain cap.
- Set the valve to Backwash with the backwash lines open, and add a sand filter cleaner as its label directs.
- Refill the tank as at start-up, turn the pump off, leave the valve on Backwash, and cut power at the breaker.
- Let it soak 12 hours, then backwash.
Don't let the cleaning solution reach the pool. Afterward the clean pressure should be close to the original; if it isn't, record the new one.
Draining, and changing the sand
To drain: pump off, isolation valves closed if the filter is below the pool's water level, and remove the drain cap at the base. Don't lose the plug.
To remove the sand: drain the filter, then turn the pump off and open the air release before touching the lid. Take the lid off, by hand if possible, or by tapping the handles with a soft-faced mallet. Scoop out as much sand as you can, keeping it out of the diffusers, and vacuum more with a wet/dry vac. Then loosen the union coupling nut at the drain, draw out the drain screen without losing its o-ring, and flush the rest out with water.
Winter and maintenance
Winterizing: backwash, turn the pump off at the breaker, and open the air release valve. Remove the drain cap and leave it off until spring, storing it and its seal safely. Drain all the piping; a multiport valve with a Winterize position goes there. Cover the equipment with a tarp, but don't wrap motors in plastic.
Through the season: check the pressure at least once a week, and check the gauge and air release for leaks. Clean the outside with mild detergent and water only, never strong cleansers or solvents. Keep the skimmer and pump baskets empty. Jandy's manual says to call a qualified technician for any leak or gauge problem.
Warranty and where to buy
One year, parts only. Jandy's warranty doesn't cover a filter bought online, and it requires installation and service by a licensed pool contractor where one is required, or an experienced pool professional. Buy from a pool dealer and keep the receipt. The manual adds that water above 104°F may void it.
Where Jandy's documents disagree, or are unclear
- Weight on the pad. The manual says filter systems can weigh up to 1,100 lb. Its own sand table gives the SFSM140 1,200 lb of sand alone, plus a 147 to 150 lb tank.
- Layered media. The sand-and-gravel columns don't add up to the sand-only weights on three sizes. The SFSM100 takes 625 lb of sand alone, or 500 lb of sand plus 150 of gravel, which is 650. The SFSM120 is 1,050 against 1,075, and the SFSM140 1,200 against 1,275. Only the SFSM60's figures agree. Jandy says to go by the freeboard in any case.
- The SFSM60 product page. It gives a height of 35.4 inches, where the manual, brochure and catalog say 34, and a shipping weight of 162 lb, where the manual gives 70 lb empty.
- Rinse time. The start-up procedure says 30 to 40 seconds; the routine backwash says one minute.
- Taking the lid off. One section says to loosen the hand wheel, press it down and turn the lid 15°. The sand removal section says to pull it off by the handles, or tap the handles with a mallet.
- Troubleshooting. The manual refers to a separate troubleshooting guide. Jandy's product page doesn't list one.
Which model do you have?
The model number is on the filter label. Everything else in the range is shared — these are the parts that change with it.
| Model | SKU | Filter area | Max flow | Backwash flow min. | Sand only | Freeboard | Height | Lid clearance | Weight, empty | Laterals | Inlet plumbing | Outlet plumbing | Bulkhead fitting | Note |
|---|---|---|---|---|---|---|---|---|---|---|---|---|---|---|
| SFSM100 | SFSM100 | 5.00 sq. ft. | 100 GPM | 75 GPM | 625 lb | 15.0 in. | 41 in. | 44 in. | 75 lb | R0882301 | R0881901 | R0882201 | R0882400 | Sold as the 30 in. filter, and 32.5 in. across. Union connections. |
| SFSM100F | SFSM100F | 5.00 sq. ft. | 100 GPM | 75 GPM | 625 lb | 15.0 in. | 41 in. | 44 in. | 80 lb | R0882301 | R0881902 | R0882202 | R0882401 | The SFSM100 with 3 in. flange connections. Jandy says only the union versions are Versa Plumb-ready. |
| SFSM60 | SFSM60 | 3.15 sq. ft. | 63 GPM | 47 GPM | 375 lb | 12.4 in. | 34 in. | 40 in. | 70 lb | R0882300 | R0881900 | R0882200 | R0882400 | The smallest: sold as the 24 in. filter, 26 in. across. Union connections only, and the only size with small diffusers and 6 in. laterals. |
| SFSM120 | SFSM120 | 5.90 sq. ft. | 118 GPM | 88 GPM | 1,050 lb | 13.5 in. | 47 in. | 50 in. | 143 lb | R0882302 | R0881903 | R0882203 | R0882400 | Sold as the 35 1/2 in. filter, which Jandy says fits through a 36 in. door. It measures 35.5 in. across. Union connections. |
| SFSM120F | SFSM120F | 5.90 sq. ft. | 118 GPM | 88 GPM | 1,050 lb | 13.5 in. | 47 in. | 50 in. | 147 lb | R0882302 | R0881904 | R0882204 | R0882401 | The SFSM120 with 3 in. flange connections. |
| SFSM140 | SFSM140 | 7.06 sq. ft. | 141 GPM | 105 GPM | 1,200 lb | 16.0 in. | 49.7 in. | 52 in. | 147 lb | R0882302 | R0881905 | R0882205 | R0882400 | The largest: sold as the 37 in. filter, 37.5 in. across. Union connections. |
| SFSM140F | SFSM140F | 7.06 sq. ft. | 141 GPM | 105 GPM | 1,200 lb | 16.0 in. | 49.7 in. | 52 in. | 150 lb | R0882302 | R0881906 | R0882206 | R0882401 | The SFSM140 with 3 in. flange connections. |
Jandy SFSM Sand Filter parts, and what goes wrong
Read off the manufacturer’s parts list and checked before it ships. Open a row for what a bad one actually does — or start from the symptom and work down, which is the cheaper order.
What is it doing?
Jandy's warning is direct: cracked or broken laterals send sand to the pool. Before filling, check they're screwed firmly into the hub, the hub is centered and the laterals are level, and replace any broken in shipping. Then pour the media in slowly until they're covered, as Jandy says, to avoid damaging them. The SFSM60 takes R0882300, 6 in., 8-pack; the SFSM120 and SFSM140 take R0882302, 10 in., 12-pack.
Live pricing arrives when the retailer programs are approved.
Jandy calls the gauge the primary indicator of how the filter is running. Check it and the air release assembly for air or water leaks at least once a week, and keep it in working order. Wrap its threads with PTFE tape and screw it into the tee until watertight, but don't overtighten, or the tee can crack. The clean/dirty snap ring goes on once the filter is running. Fluidra lists the gauge alone and the gauge and air release assembly kit, R0881500.
Live pricing arrives when the retailer programs are approved.
Inspect the lid and tank before fitting the lid: Jandy warns a damaged lid can be blown off. The o-ring must be clean, lubricated with a non-petroleum lubricant, and uncompressed before the lid goes in. Drop the lid in, turn it 15° clockwise, then turn the hand wheel clockwise as far as it goes. Never adjust or remove the lid with the pump running or pressure in the system.
Live pricing arrives when the retailer programs are approved.
The automatic vent tubing runs up through the diffuser with the vent screen at its top. Jandy warns that if the tubing and screen aren't positioned properly, air is trapped in the filter, and trapped air can blow the lid off. Take care not to dislodge them when filling with sand. Each size and connection type has its own breather tube; see the complete parts list.
Live pricing arrives when the retailer programs are approved.
The drain at the base takes both water and sand. To drain, shut the pump off, close the isolation valves if the filter sits below the pool's water level, and remove the drain cap. For winter, leave the cap off and store it and its seal until the next start-up. For a sand change, scoop and vacuum out what you can, then unscrew the union coupling nut, draw out the drain screen without losing its o-ring, and flush the rest.
Live pricing arrives when the retailer programs are approved.
Jandy SFSM Sand Filter manuals and documentation
Hosted by the manufacturer. These open on Jandy’s own servers, so they stay current.
Jandy SFSM Sand Filter warranty
1 year parts, None labor
One year from the date of retail purchase under Jandy's limited warranty, which lists no exception for filters. It pays for the replacement product or part only: labor and transportation are excluded. It doesn't apply to a filter bought through the internet or any e-commerce platform; Jandy excepts only valves under 3 in., parts and accessories from that rule. The filter has to be installed and serviced by a licensed pool contractor where the jurisdiction requires one, or otherwise by an experienced pool professional, and the SFSM manual repeats that on its cover. Coverage is for the first retail purchaser, doesn't transfer, and ends if the filter is moved. Purchased replacement parts get 90 days, and commercial use gets one year. The manual adds that improper installation or operation may void it, and so may running water above 104°F.
Manufacturer’s termsJandy SFSM Sand Filter complete parts list
Every part on the manufacturer’s exploded diagram, in their numbering. Marked rows are the ones covered above with a symptom and a diagnosis.
36 parts
| No. | Part | Description | Note |
|---|---|---|---|
| 1 | R0881400 | Lid assembly what goes wrong | All sizes |
| 2 | R0881500 | Gauge and air release assembly kit | All sizes |
| 3 | R0881600 | Pressure gauge what goes wrong | All sizes |
| 4 | R0881700 | Lock ring with hardware kit | All sizes |
| 5 | R0881800 | Filter base kit | SFSM60 |
| 5 | R0881801 | Filter base kit | SFSM100 and SFSM100F |
| 5 | R0881802 | Filter base kit | SFSM120, SFSM120F, SFSM140 and SFSM140F |
| 6 | R0881900 | Inlet plumbing kit | SFSM60 |
| 6A | R0881901 | Inlet plumbing kit | SFSM100 |
| 6B | R0881902 | Inlet plumbing kit | SFSM100F |
| 6A | R0881903 | Inlet plumbing kit | SFSM120 |
| 6B | R0881904 | Inlet plumbing kit | SFSM120F |
| 6A | R0881905 | Inlet plumbing kit | SFSM140 |
| 6B | R0881906 | Inlet plumbing kit | SFSM140F |
| 7 | R0882000 | Diffuser, small, 1-pack | SFSM60 |
| 7 | R0882001 | Diffuser, large, 1-pack | SFSM100 to SFSM140F |
| 8 | R0882100 | Breather tube assembly | SFSM60 |
| 8A | R0882101 | Breather tube assembly what goes wrong | SFSM100 |
| 8B | R0882102 | Breather tube assembly | SFSM100F |
| 8A | R0882103 | Breather tube assembly | SFSM120 |
| 8B | R0882104 | Breather tube assembly | SFSM120F |
| 8A | R0882105 | Breather tube assembly | SFSM140 |
| 8B | R0882106 | Breather tube assembly | SFSM140F |
| 9 | R0882200 | Outlet plumbing kit | SFSM60 |
| 9A | R0882201 | Outlet plumbing kit | SFSM100 |
| 9B | R0882202 | Outlet plumbing kit | SFSM100F |
| 9A | R0882203 | Outlet plumbing kit | SFSM120 |
| 9B | R0882204 | Outlet plumbing kit | SFSM120F |
| 9A | R0882205 | Outlet plumbing kit | SFSM140 |
| 9B | R0882206 | Outlet plumbing kit | SFSM140F |
| 10 | R0882300 | Laterals kit, 6 in., 8-pack | SFSM60 |
| 10 | R0882301 | Laterals kit, 8 in., 12-pack what goes wrong | SFSM100 and SFSM100F |
| 10 | R0882302 | Laterals kit, 10 in., 12-pack | SFSM120, SFSM120F, SFSM140 and SFSM140F |
| 11A | R0882400 | Bulkhead fitting with o-rings, union, 1-pack | Union models: SFSM60, SFSM100, SFSM120, SFSM140 |
| 11B | R0882401 | Bulkhead fitting, 3 in. flange | Flange models: SFSM100F, SFSM120F, SFSM140F |
| 12 | R0882500 | Drain cap kit what goes wrong | All sizes |