Hayward · Super Pump
Hayward Super Pump VS 600
Hayward's variable-speed Super Pump with OmniX built in: the priming run it does on its own, the button that overrides it, and what the LED flashes mean.
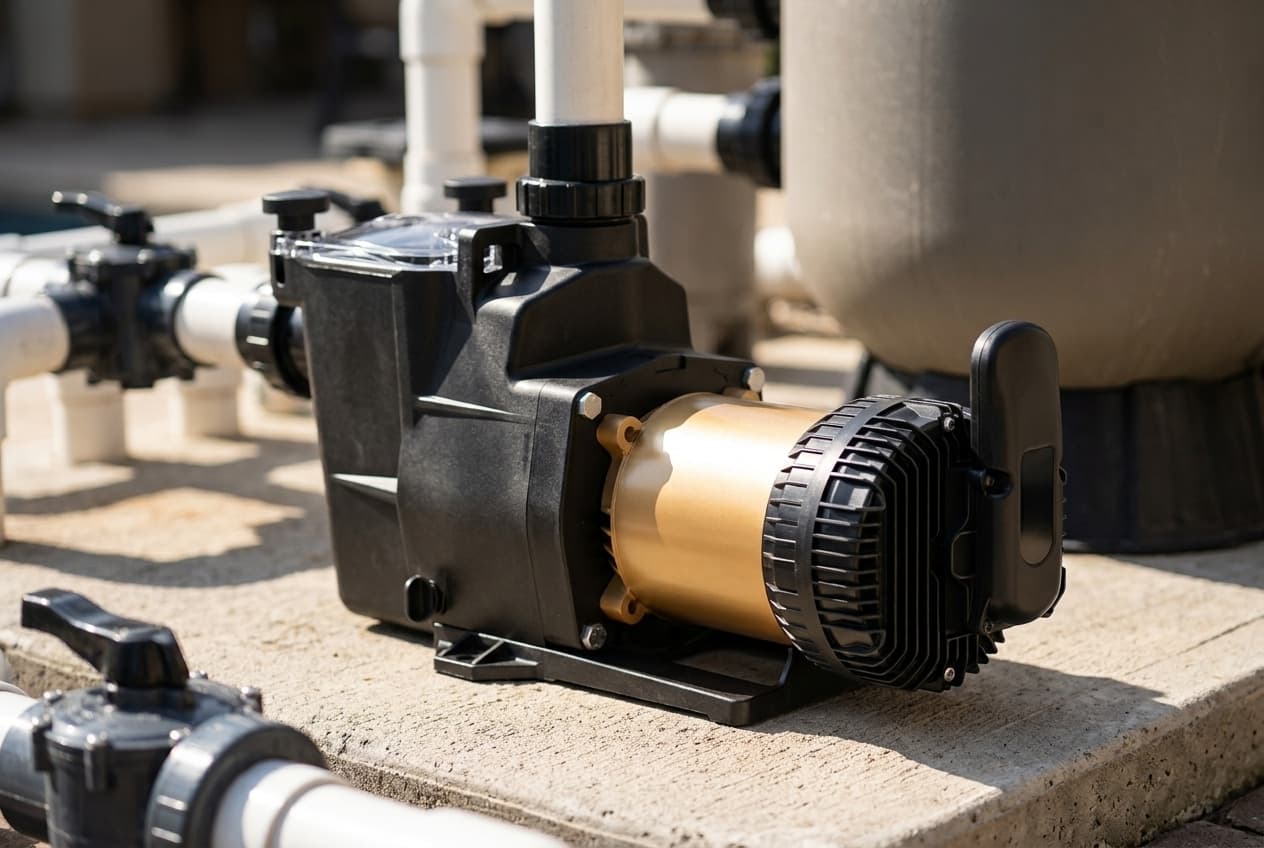
The Super Pump VS 600 is Hayward's variable-speed Super Pump with an OmniX module built in, which you set up and control from the OmniX app over Bluetooth. It comes in 1.65 and 2.25 total horsepower, the VSP26615 and VSP26620, with W3 versions sold online. It runs from 600 to 3,450 RPM, on 115 or 230 volts.
Its wet end is the Super Pump's. The housing, basket, lid, gaskets, shaft seal, seal plate, diffuser and both impellers carry the same part numbers as the single-speed Super Pump, so the plumbing and the spares carry over. Hayward calls it "the best drop-in replacement".
One manual covers it alongside the TriStar VS 800 and MaxFlo VS 400 series, the other two families in Hayward's 400/600/800 OmniX Series. This page is the Super Pump version; where the manual differs by family, the numbers here are the Super Pump's.
1.65 or 2.25 HP
- Efficiency: WEF 8.5 on the VSP26615 and 7.7 on the VSP26620, per Hayward's product pages. The smaller pump is the more efficient one.
- Head: Hayward's curves put the VSP26615 at about 67 feet with no flow and the VSP26620 at about 76.
- 115 volts: both pumps list 19.9 amps at 115 V. At 230 V the VSP26615 draws 10.9 and the VSP26620 14.2. Hayward's curve shows the VSP26620 giving up flow on 115 V from about 40 GPM upward, so the bigger pump earns its keep on 230 V.
Hayward's pipe chart is worth checking before either: 2-inch pipe is rated for 80 GPM and 2 1/2-inch for 110. The manual recommends capping the pump's maximum speed so it can't exceed the flow the plumbing is sized for.
Installing it
Placement: as close to the pool as codes allow, on a level, rigid base, bolted down. Shade is advised. Pick a well-drained spot that won't flood, never damp or unventilated, and keep the inlet as close to water level as possible with a short, direct suction line that slopes continuously upward. Leave at least five pipe diameters of straight pipe before the inlet.
Plumbing: the ports are 2-inch female NPT with molded thread stops. Wrap male threads with one or two layers of PTFE tape, clockwise facing the open end. Hand-tighten, then give 1 1/2 turns more with a tool, and no more. No pipe dope, which can crack the plastic.
Wiring:
- Turn off the breaker.
- Remove the four screws holding the OmniX module and rest it on top of the motor, cable still attached.
- Set the voltage jumper. It ships set for 230 V; for 115 V, move it to the 115 V position. Connect L1 and L2 (or L1 and neutral on 115 V) and ground.
- Refit the module with its four screws. It seals the wiring compartment, so it has to go back properly.
- Bond the pump with No. 8 solid copper to the lug on top of the motor.
The pump must be permanently wired, on a GFCI-protected circuit, with a disconnect at least 5 feet from the pool's inside wall and no extension cord. Voltage at the pump must stay within 10% of the nameplate.
Temperature sensor: drill a 3/8-inch hole in the pipe between the pump and the filter, push the module's sensor in, and hand-tighten the hose clamp over it until the o-ring seals. Don't overtighten.
Pressure testing: Hayward wants its pump out of the system for a pressure test. If it has to stay in, no more than 10 psi.
First start-up
- Fill the strainer housing with water to the level of the suction pipe. If anything leaks, don't start the pump.
- Open all suction and discharge valves and the filter's air relief valve.
- Stand at least 10 feet away and power the pump.
- It primes on its own, at 100% speed for 8 minutes by default, and Hayward says priming can take up to 10. If it hasn't primed in 10 minutes, stop it and find out why.
- Close the filter's air relief once a steady stream of water comes out.
- After priming, it runs at 50% speed on a factory schedule until you change it in the app.
Never run it dry, and never add undiluted chemicals just ahead of the pump's suction. Both damage it and void the warranty.
Setting it up in the OmniX app
- Download the OmniX app, turn on Bluetooth, and sign in. An existing Hayward OmniLogic account works.
- Power the pump. The module's blue LED blinks while it waits to be claimed. To skip the priming run while you do this, press the pump button 4 times.
- Create a site or join an existing one, then claim the pump in the app. The LED turns solid.
In the app you can set schedules, three speed presets, minimum and maximum speeds, priming, freeze protection, countdown timers, and a temperature offset. You can also set the pump type (filter, accessory or booster) and see diagnostics and history. Control away from home needs the OmniX Gateway, W3GATEWAYX1.
The button, and running without the app
A quick press of the pump's button overrides the schedule for 3 hours. The first press is High, the second Medium, the third Low, and the fourth Stop, which holds until you cancel it. Hold the button 4 seconds to leave override. The schedule's start time doesn't change.
The pump also runs without OmniX: disconnect the module cable and it works from the single button alone, using Hayward's legacy programming instructions, which are online rather than in the manual.
What the LED flashes mean
- 1 flash, DC voltage out of range: check the line voltage is within 10% of the rating at the terminal block, the connections at the breaker and terminal block, and the voltage jumper.
- 2 flashes, motor current too high: check the impeller, diffuser, shaft seal and motor for binding.
- 3 flashes, drive overheated: clear the motor's airflow path, and check the ambient temperature against the nameplate.
- 4 flashes, pump stalled: the drive lost control of the shaft or couldn't start it. Check the impeller, diffuser, seal and motor for binding.
- 5 flashes, internal motor or drive failure: the motor and drive assembly may need replacing. Call Hayward Technical Service, (908) 355-7995.
- 6 flashes, module communication lost: check the module LED is on and its cable is plugged in.
Press the button while an error shows, or cycle the power, to clear it. If the pump won't restart after a power cut and its ring LED is blinking, press the button. When you cut power on purpose, wait at least 60 seconds for the LED to go out completely before restoring it.
When it isn't working
- Motor won't start: check the wiring, the input voltage, and that the pump is wired for the supply. Look for loose connections, open switches, tripped breakers or blown fuses. Turn the shaft by hand to check it moves freely.
- Motor shuts off and the LED isn't solid: low voltage at the motor, often from undersized wiring.
- Hums but won't start: an impeller jammed with debris.
- Won't prime: the housing isn't full, or the lid gasket is dirty, unseated or dry. Suction-side connections may be loose, or valve o-rings leaking. The basket may be full, or the suction side clogged: Hayward says there should be 5 to 6 inches of vacuum at the strainer cover. Replace the shaft seal only if it's leaking.
- Low flow: a clogged strainer or suction line, undersized pipe, a dirty filter or partly closed valve, a suction air leak, or a plugged or damaged impeller.
- Noisy: suction air leaks or cavitation, a low pool level, unrestricted returns, loose mounting, debris in the housing, or worn bearings.
Looking after it
- Clean the basket regularly, and inspect the lid gasket.
- Before opening the lid: stop the pump, close the suction and outlet valves, release pressure at the filter's air relief, and refill the housing before refitting the cover. Lubricate the lid o-ring with Jack's 327 if needed.
- No lubrication otherwise. The bearings and seal are self-lubricating.
- Keep the motor clean and its vents clear, and don't hose the motor off.
- Let the motor cool at least 20 minutes before working on it.
- Hayward says seals, gaskets and similar components should be replaced at least every ten years, or sooner if damaged.
The OmniX module has a non-replaceable coin battery. Don't try to remove it.
Winterizing
Turn the power off. Lower the water below all the pool's inlets, remove the drain plugs and strainer cover, and let the pump drain. Disconnect it from the pad, wiring and pipes, refit the cover and plugs, and store it dry. Freezing with water in it voids the warranty. Use only propylene glycol antifreeze, never compressed air, only a blower under 5 psi, and don't wrap the pump in plastic.
Replacing the shaft seal
Hayward says only qualified people should do this. With the power disconnected:
- Remove the four 3/8 x 2-inch bolts holding the motor to the housing with a 9/16-inch socket, and slide the motor out.
- Pull the diffuser off the seal plate.
- Remove the OmniX module, hold the motor shaft with a 5/16-inch hex key in its socket, and unscrew the impeller counterclockwise.
- Take the spring seal off the impeller, remove the seal plate, and press out the ceramic seat.
- Clean everything and lubricate the shaft and seal recess with a mild liquid soap solution. Press the new ceramic seat in, polished face out.
- Refit the seal plate. Press the spring seal onto the impeller shaft, black face toward the ceramic, and screw the impeller on clockwise, snug. Refit the module and the diffuser.
- Slide the motor back without disturbing the diffuser gasket, with the housing gasket in place and lubricated. Tighten the four bolts alternately and evenly to 80 inch-pounds.
Warranty and where to buy
The VSP26615 and VSP26620 get 3 years parts and 1 year labor through a pool store or service company. The W3 versions are the ones sold online, and the warranty on those depends on which Hayward document you trust: see below. Seals and o-rings are wear items. Keep the receipt, and register the pump for an extra 90 days.
Where Hayward's documents disagree, or are unclear
- The W3 warranty. Hayward's W3VSP26615 and W3VSP26620 pages say 3 years parts and 1 year labor. Hayward's 2026 Open Line terms and warranty page give Open Line products 1 year parts and no labor, with exceptions only for salt cells and TracVac cleaners. The Amazon listing says 1 year parts.
- Length. The manual and sell sheet show the pump 25 1/4 inches long. Hayward's "Super Pump VS with OmniX" line drawing, which the VS 700's page links too, says 27.42.
- Current at 115 V. The sell sheet gives both sizes the same 19.9 A at 115 V, while the 230 V figures differ.
- The sell sheet Hayward links is the Canadian bilingual edition, pointing to ca.hayward.com.
- Motor type. The product pages say ODP. The manual doesn't say, and the older Super Pump VS 700 is TEFC.
- Power end names. Hayward's online diagram lists the power ends for the "VS 600 & Super Pump XE"; the manual names only the VS 600.
- Drop-in replacement. The sell sheet calls it the best drop-in replacement. Hayward's own replacement guide, which maps other brands' pumps to the OmniX range, lists the Super Pump VS 600 against only one pump, Jandy's VS FloPro VSFHP165JEP, and sends most others to the TriStar VS or MaxFlo VS.
Which model do you have?
The model number is on the pump label. Everything else in the range is shared — these are the parts that change with it.
| Model | HP | SKU | WEF | Amps at 115 / 230 V | Head at no flow | Impeller | Power end | Online version | Note |
|---|---|---|---|---|---|---|---|---|---|
| VSP26615, 1.65 total HP | 1.65 THP | VSP26615 | 8.5 | 19.9 / 10.9 | About 67 ft | SPX2610C | VSX26615PE | W3VSP26615, Open Line | W3VSP26615 is the Open Line version, approved for online sale, and the one on Amazon. Hayward's pages give both the same specifications. |
| VSP26620, 2.25 total HP | 2.25 THP | VSP26620 | 7.7 | 19.9 / 14.2 | About 76 ft | SPX2615C | VSX26620PE | W3VSP26620, Open Line | W3VSP26620 is the Open Line version. On 115 V it draws the same 19.9 A as the smaller pump, and Hayward's curve shows it giving up flow on 115 V above about 40 GPM compared with 230 V. |
Hayward Super Pump VS 600 parts, and what goes wrong
Read off the manufacturer’s parts list and checked before it ships. Open a row for what a bad one actually does — or start from the symptom and work down, which is the cheaper order.
What is it doing?
Hayward says to replace the shaft seal only if it's leaking, and to replace any leaking seal at once: a leak lets chlorinated water into the motor bearings, which wash out and whine. Running the pump dry can damage the seal, and it voids the warranty. The seal comes in two halves, a ceramic seat in the seal plate and a spring seal on the impeller, and both polished faces scratch easily. A Viton version is SPX1600Z2VIT. Replace the seal whenever the impeller is replaced.
Live pricing arrives when the retailer programs are approved.
Hayward's first cause for a motor that hums without starting is an impeller jammed with debris, cleared by a qualified professional. For low flow, a plugged, restricted or damaged impeller is the last cause on its list, replaced with a new seal. Two flashes (motor current too high) and four (pump stalled) both start with checking the impeller, diffuser, shaft seal and motor for binding. The VSP26620's impeller is SPX2615C. It unscrews counterclockwise, with a 5/16 in. hex key holding the motor shaft through the socket under the OmniX module.
Live pricing arrives when the retailer programs are approved.
A leaking lid is the first thing Hayward checks on a pump that won't prime. The gasket must be clean, seated in its groove, and lubricated with Jack's 327, and the cover locked firmly. Hand-tighten the knobs; no tools. Hayward also says to inspect the cover gasket regularly and replace it as needed.
Live pricing arrives when the retailer programs are approved.
A basket loaded with debris is on Hayward's list for both. Clean it regularly, and don't knock it against anything to empty it. Before opening the lid: stop the pump, close the suction and outlet valves, and release the pressure at the filter's air relief valve.
Live pricing arrives when the retailer programs are approved.
Six flashes means the pump has lost contact with the module. Check the module's LED is on and its cable is plugged into the pump, then contact Hayward. The pump can run without the module in the meantime, on its single button. To reset the module and unclaim it, hold its connect button about 7 seconds until the LED flashes rapidly, then press it 3 times; the LED then flashes slowly. The module includes the water temperature sensor.
Live pricing arrives when the retailer programs are approved.
Five flashes is an internal motor or drive failure, which Hayward says may mean replacing the motor and drive assembly; call Hayward Technical Service at (908) 355-7995. Three flashes is the drive overheating: clear the motor's airflow path and check the ambient temperature against the nameplate. The power end comes with the seal, motor cap screws, seal plate, diffuser gasket, diffuser, motor mounting plate, impeller and OmniX module. The VSP26620's is VSX26620PE.
Live pricing arrives when the retailer programs are approved.
If you are doing the job anyway
Once the motor is out of the housing, the gaskets it passes are the cheap parts to replace.
Shaft seal replacement
The seal change slides the motor out of the housing. Hayward says to inspect the gaskets and replace any that are damaged, to have the housing gasket in place and lubricated when the motor goes back, and not to disturb the diffuser gasket.
- Shaft seal assemblySPX1600Z2
- SPX1600TSPX1600T
- SPX1600RSPX1600R
Hayward Super Pump VS 600 manuals and documentation
Hosted by the manufacturer. These open on Hayward’s own servers, so they stay current.
- 400/600/800 Series variable speed pumps owner's manual (IS3200OX Rev. B, 2026)manual
- 400/600/800 Series quick start guide (QRG3200OX Rev. B)guide
- Super Pump VS 600 sell sheet (LITSPVS600X25C, Canadian bilingual edition)spec
- Super Pump VS 600 performance curvescurves
- Replacement product guide, VS pumps with OmniX (LITRPGVSX25)guide
- Super Pump VS with OmniX line drawing, sidespec
- VSP26615 product page — specifications and the interactive parts diagramdiagram
- W3VSP26615 product page (Open Line)spec
- Hayward 2026 Expert Line warranty termsspec
- Hayward 2026 Open Line warranty termsspec
Hayward Super Pump VS 600 warranty
3 years parts, 1 year labor
Three years parts and one year labor on the Expert Line VSP26615 and VSP26620, per their product pages and Hayward's 2026 Expert Line terms, where a Hayward Rewards dealer can extend field labor to two years. The Open Line W3 versions are where the documents part company: their product pages also say three years parts and one year labor, but Hayward's 2026 Open Line terms and its warranty page give Open Line products one year parts and no labor, and name no exception for pumps. The Amazon listing for the W3VSP26615 says one year parts only. The manual adds four things that void the warranty: running the pump dry, adding undiluted chemicals just ahead of its suction, letting it freeze with water in it, and using non-Hayward replacement parts. Pump seals and o-rings are wear items in Hayward's terms, covered for manufacturing defects only. Hayward's warranty page also requires the pump to come from Hayward or an authorized seller, starts coverage no earlier than delivery, and adds 90 days for registering.
Manufacturer’s termsHayward Super Pump VS 600 complete parts list
Every part on the manufacturer’s exploded diagram, in their numbering. Marked rows are the ones covered above with a symptom and a diagnosis.
22 parts
| No. | Part | Description | Note |
|---|---|---|---|
| 1 | SPX1600T | Housing gasket | |
| 2A | SPX1600Z2 | Shaft seal assembly what goes wrong | |
| 2B | SPX1600Z2VIT | Shaft seal assembly, Viton | |
| 3 | SPX1600Z52 | Mounting foot screws, set of 2 | |
| 4 | SPX3200Z5PAK4 | Motor cap screws, set of 4 | |
| 5 | SPX2600G1 | Mounting foot, VSP, with screws | |
| 6 | SPX2600E5 | Seal plate | |
| 7A | VSX26615PE | Power end, 1.65 HP what goes wrong | VSP26615; Hayward's online diagram also lists it for the Super Pump XE |
| 7B | VSX26620PE | Power end, 2.25 HP | VSP26620; also listed for the Super Pump XE |
| 8 | SPX1600R | Diffuser gasket | |
| 9 | SPX1620AA | Pump and strainer housing, 2 x 2 in., with gasket and drain plugs | |
| 10 | SPX1600M | Strainer basket what goes wrong | |
| 11 | SPX1600S | Strainer cover gasket what goes wrong | |
| 12 | SPX1600D | Strainer cover | |
| 13 | SPX1600PN | Swivel nut and hand knob | |
| 14 | SPX2600B | Diffuser | |
| 15 | SPX1700FG | Drain plug with gasket | |
| 17 | SPX1600F5 | Motor mounting plate | |
| 18 | SPX1600Z4 | Housing cap screw | |
| 19A | SPX2610C | Impeller, 1.65 THP what goes wrong | VSP26615 |
| 19B | SPX2615C | Impeller, 2.25 THP | VSP26620 |
| 20 | VSPOMNIX | OmniX module what goes wrong |
Buy the pump
One retailer for now. More get added here as their programs are approved, and this becomes a comparison rather than a link.